Template guide
Make your interactive avatar
Seven images of one face — a neutral portrait and six expressions — turn the hero avatar into a person who leans toward the cursor, blinks, smiles when you hover and laughs when you click. Any modern AI image model can make them.
7 images · About 30 minutes · No 3D skills · Hover, wait or click the avatar above
Overview
What you’ll make
Seven square images of the same person, all edited from one portrait:
Image
What it does on the site
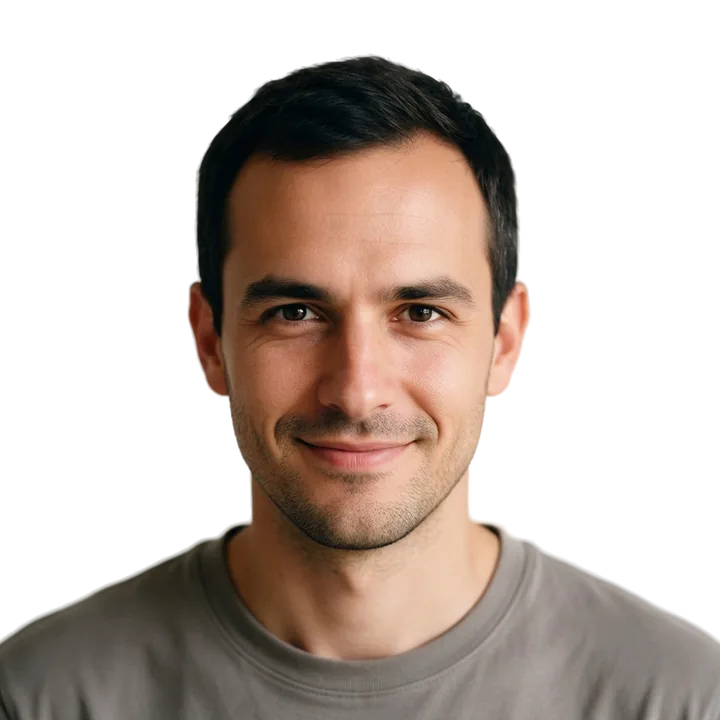
Portrait (neutral)
Shown at rest; leans smoothly toward the cursor
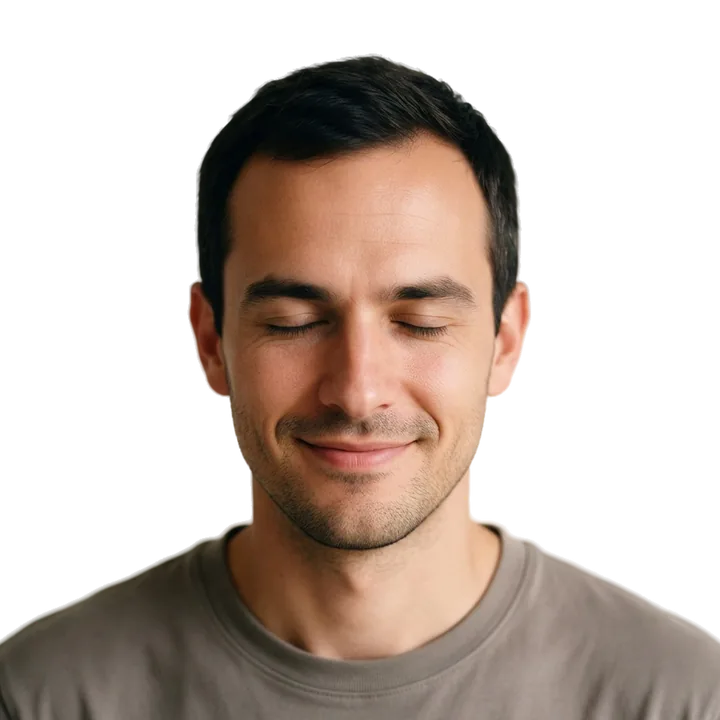
Blink
Natural blinking every few seconds
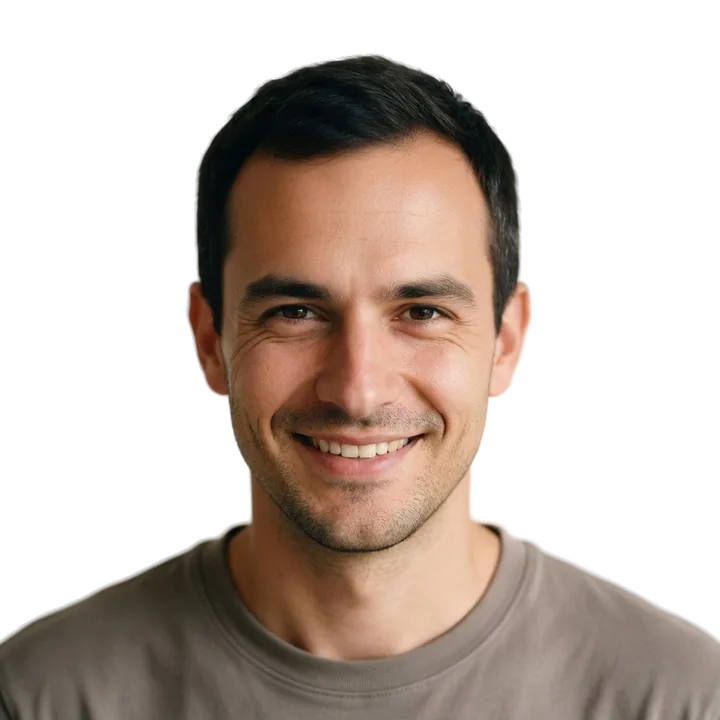
Smile
Hovering the face
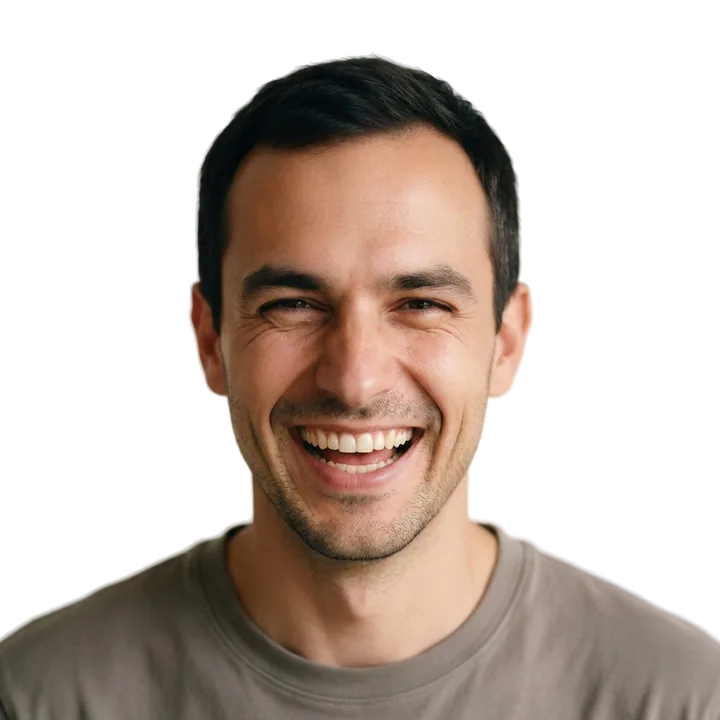
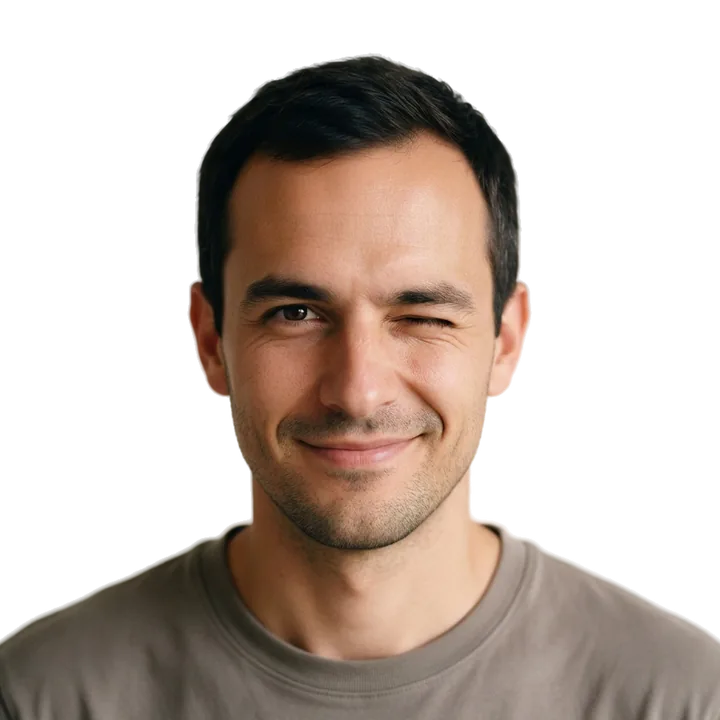
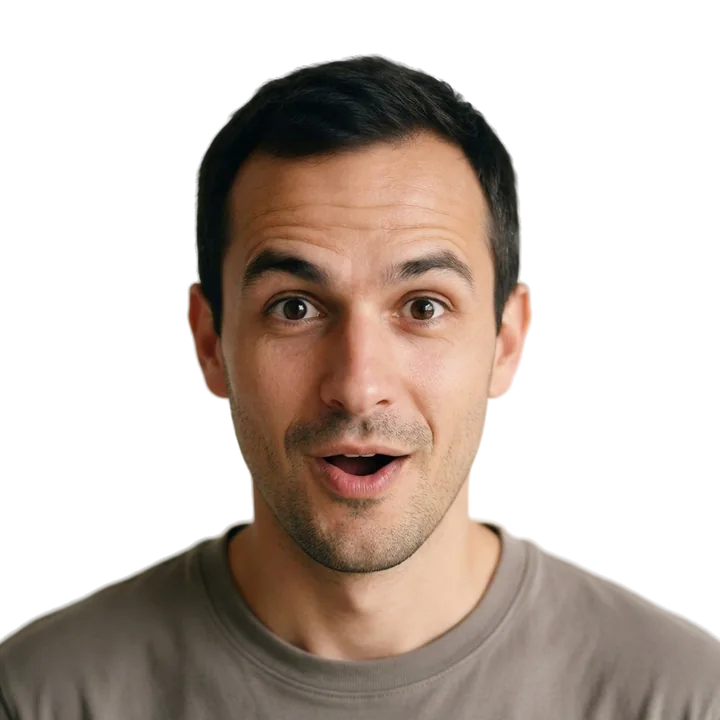
Laugh (or Surprised / Wink)
Clicking or tapping
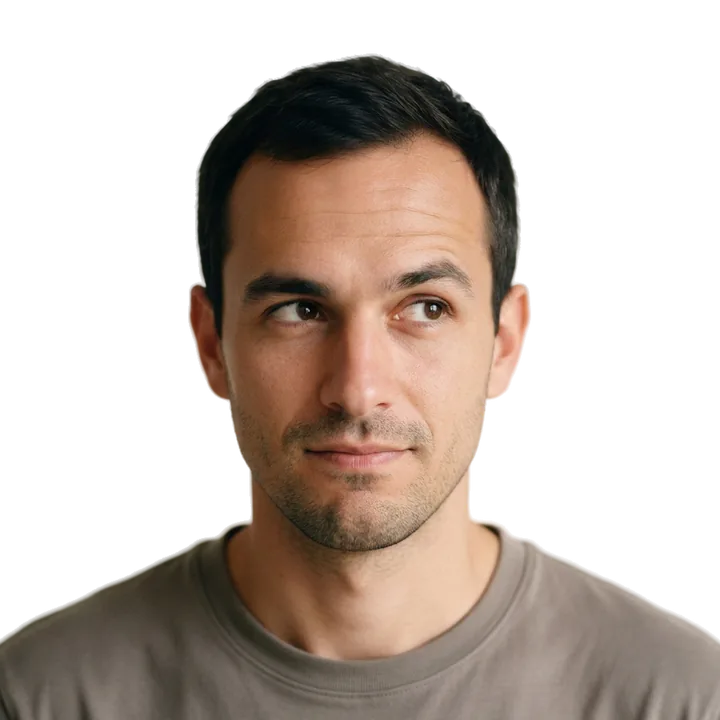
Thinking
When the visitor stops moving the mouse

This is the set made for the demo persona, Leo. Every image on this page came from the prompts below.
Before you start
Which AI models to use
You need two abilities: making a photoreal portrait, and editing a photo while keeping exactly the same person. Use these models on whichever platform you already like — most AI image apps offer several of them.
Job
Models that do it well
Must have
Portrait from a prompt (skip if you use your own photo)
Seedream, FLUX, Imagen, GPT Image, Midjourney
Photoreal skin, 1:1 output
Expression edits
Nano Banana Pro, Seedream (edit), FLUX Kontext, GPT Image, Qwen Image Edit
Accepts a reference image and keeps the face
Background removal
Any background remover (most use BiRefNet or RMBG under the hood)
Clean hair edges, transparent PNG
The demo used Seedream for the portrait and Nano Banana Pro for all six edits. If one model changes the face too much, try another — identity-keeping varies more between models than image quality does.
Step 1
The base portrait
Everything else is edited from this one image, so get it right first: front-facing, head and shoulders, with space around the head.

Use your own photo: stand about 1 m from a plain wall in soft window light. Face the camera, look into the lens and relax into a small closed-mouth smile. Frame from mid-chest up with a hand’s width above your head. Square crop, at least 1024 × 1024 px. Avoid glasses glare, hats, hair over the face and busy backgrounds.
Or generate one: paste this into a photoreal model, change the person’s description, make 4 and pick the most centred one with the most room above the head.
Realistic studio portrait photograph of a friendly man in his early 30s, a design engineer. Short dark hair, light natural stubble, calm warm expression with a subtle closed-mouth smile, looking straight into the camera. Wearing a plain warm-grey crew-neck t-shirt. Head and shoulders, centered, front-facing, symmetrical framing with space above the head. Soft diffused warm key light, gentle shadows, natural skin texture with pores, sharp eyes. Plain seamless backdrop in warm light grey-beige (#E9E6E0). Shot on 85mm lens, f/4, true-to-life colors, high detail, no retouching look, no props, no text.
Keep clothing plain and the backdrop flat — logos, patterns and textured walls are where AI edits drift most.
Step 2
The six expressions
Make one edit per expression, each time attaching the base portrait as the reference image. Never edit an already-edited image — small changes pile up. Square output, 1024 px or more.
Each prompt below is complete; copy it as is.
Edit the reference photo. Keep exactly the same person, face, hair, facial hair, clothing, lighting, backdrop, head position, camera position, crop and framing, facing the camera. Only change: both eyes gently and fully closed in a natural relaxed blink, eyelids soft, same calm subtle smile. Photorealistic.
Edit the reference photo. Keep exactly the same person, face, hair, facial hair, clothing, lighting, backdrop, head position, camera position, crop and framing, facing the camera. Only change: a warm, genuine friendly smile showing a little of the upper teeth, cheeks lifted, slight crinkles at the eyes, looking into the lens. Photorealistic.
Edit the reference photo. Keep exactly the same person, face, hair, facial hair, clothing, lighting, backdrop, head position, camera position, crop and framing, facing the camera. Only change: laughing out loud, a big genuine open-mouth laugh showing teeth, eyes squinted and crinkled with joy, head still in the same place. Photorealistic.
Edit the reference photo. Keep exactly the same person, face, hair, facial hair, clothing, lighting, backdrop, head position, camera position, crop and framing, facing the camera. Only change: a playful wink, the eye on the right side of the image fully closed, the other eye open looking into the lens, a cheeky lopsided smile. Photorealistic.
Edit the reference photo. Keep exactly the same person, face, hair, facial hair, clothing, lighting, backdrop, head position, camera position, crop and framing, facing the camera. Only change: a surprised, delighted expression, eyebrows raised high, eyes wide open looking into the lens, mouth open in a small round “oh!”. Photorealistic.
Edit the reference photo. Keep exactly the same person, face, hair, facial hair, clothing, lighting, backdrop, head position, camera position, crop and framing, facing the camera. Only change: a thoughtful thinking expression, eyes glancing up toward the upper-right of the image, one eyebrow slightly raised, lips pressed together pushed slightly to one side. Photorealistic.
The blink matters most: it shows for 0.15 s every few seconds, so it must match the portrait almost exactly apart from the eyelids. Avoid “change camera angle” or “rotate view” tools — in testing they pulled the camera back and invented a full body.
Step 3
Check and regenerate
Lay the 7 images side by side and regenerate any that fail a check. Re-running the same prompt is usually enough.
Same person in every image: face shape, hairline, facial hair, eye colour
Same clothing, collar and lighting direction
Head and shoulders in the same place and size as the portrait
Facing the camera (only the Thinking eyes look away)
No extra hands, props or text crept in
The top of the hair is not cut off
Step 4
Remove backgrounds, align and export
Cut-outs let the person sit cleanly on the circle in light and dark mode, and keep the circle colour editable.

Remove the background of all 7 images and save transparent PNGs. Use the same tool for all of them so the edges match.
Align them. In Framer, Figma or Photoshop, stack the 7 cut-outs in a 720 × 720 frame at 50% opacity and nudge each until the face and collar sit exactly on the portrait — otherwise the head jumps when the expression changes.
Crop head and shoulders: the top of the hair about 2% below the top edge, shoulders running off the bottom. Use the identical frame for all 7.
Export as WebP, 720 × 720, quality about 80 — roughly 25–40 KB each (the demo’s 7 files total 228 KB).
Name them portrait, blink, smile, laugh, wink, surprised and thinking.
Step 5
Add them to the avatar
On the Home page, select the avatar in the hero (the circle above the name).
In the right panel set Mode to 2D Photo and Follow to Tilt.
Drop portrait.webp into Portrait.
Drop each expression into its slot: Blink, Smile (hover), Laugh (click), Wink, Surprised, Thinking (idle).
Open Preview and move the mouse around — the canvas only shows a still image.
Setting
What it does
Follow
Tilt (default), Off for expressions only, or Photo Grid (advanced, below)
Tilt
How far the portrait leans; 7° is subtle, 12° is playful
Circle / Ring
Circle fill and the thin outline around it
Hint
The pill under the avatar that links to this guide — change its text, link or delay, or turn it off
Hover Scale
How much the circle grows on hover (1.04 = 4%)
Bubble and Phrases
The speech bubble on hover and what it says
Until you add your own Portrait the avatar shows Leo. Once you do, Leo is never mixed in: an empty expression slot is skipped, and an empty Laugh falls back to Smile. Pick the click reaction with On Click — Laugh, Surprised or Wink.
Reference
What each image does
Visitor
Avatar
Image
Moves the cursor
Leans toward it on a soft spring
Portrait
Does nothing special
Blinks every 2.4–6 s
Blink
Stops moving for 8 s
Thinking look until the mouse moves
Thinking
Hovers the face
Smiles
Smile
Clicks or taps
Laughs, then smiles again
Laugh (set by On Click)
Moves the cursor away
Eases back to neutral
Portrait
Fixes
Troubleshooting
Problem
Fix
The head jumps when the expression changes
Re-align the cut-outs so face and collar sit on the portrait
A thin halo around the hair
Re-run background removal, or pick a circle colour close to the original backdrop
One expression looks like a different person
Regenerate it from the base portrait, or try another edit model
Tilt feels too strong or weak
Change Tilt (0–20°), or set Follow to Off
Nothing moves
You’re on the canvas — open Preview or the live site
Slow first load
Re-export at 720 px, WebP quality 75–80
Advanced
Optional: Photo Grid
For a head that really turns, set Follow to Photo Grid and add 15 extra images looking in each direction (5 across × 3 down) under Gaze Frames, row by row from the top-left, with Columns 5 and Rows 3. Each frame is more realistic, but the motion steps between photos instead of gliding — which is why Tilt is the default.

Edit the reference photo. Keep exactly the same person, face, hair, facial hair, clothing, lighting, backdrop, camera position, crop and framing. Shoulders and neck stay exactly in place, head stays centered over the neck at the same spot in the frame; only the head rotates. Change: head turned about [12 or 25] degrees toward the [LEFT or RIGHT] side of the image and tilted slightly [UP, level, or DOWN] (about 10 degrees); eyes look the same way. Same calm subtle smile. Photorealistic.
Row 1 tilts up, row 2 is level, row 3 tilts down. Columns go 25° left, 12° left, straight, 12° right, 25° right — “left” means the left side of the image. Align these by the collar only; the heads are meant to move.